Showing posts with label upcycling. Show all posts

Tuesday, July 20, 2010

Greeting Card Box Tutorial

I like to make greeting cards and I like to have them on hand for just the right occasion.  I, often, have "saved the day" by having a card available and I enjoy giving something that might mean more than a store bought card.  I have never had a very good system for my cards though.  Now I do!  I organized them so that I would have categories that made sense to me.  I also found out that I had big gaps in categories that I should have cards for but didn't.  So, it also helps to save money if I can make cards instead of pay outrageous store prices for them.
Everything that I used to make this project, I already had.  I didn't buy anything.  I had wanted to have a cute basket with no top, but after contemplating decided that I would save money and allow for "stacking" buy having a lidded box.  The box I used was my son's athletic shoe box, larger than a regular shoe box, it measures 13-1/2" x 10-1/4" x 5-1/2".  This size allows for all my cards and envelopes, as of today.  It is also big enough for my largest card, which is 5" x 7".
My box was a little beat up, but my plan was to cover it with black spray paint anyway!  I needed to reinforce the corners and fix up the tears, so I did that with duct tape!  Then I spray painted the whole box, except the inside, with flat black spray paint.  Now, the areas with the duct tape do have edges that can look a tiny bit different than the rest, but it really does work well overall.  I love, love, love spray paint and believe that a little spray paint can make most anything look good!
I pulled out all my cards and put them in piles to use for categories.  My cards created more categories than I thought they would. 
 
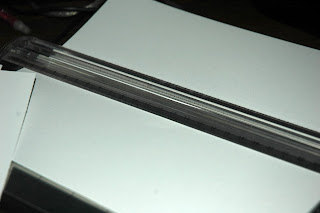
I measured the inside of the box and made dividers for the number of categories that I had.  My dividers are 9-1/2" x 4" and they are cut from regular white cardstock that I already had.  I made them shorter than the box because I knew that I would want my category labels to stick up.
  
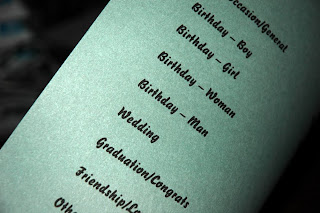
I printed the category titles onto a simple piece of lightly decorated card stock with a nice simple font.  I cut these out, making sure to cut them all the same size.
My categories ended up being:
*Tags (for on gift packages)
*Birthday - Boy
*Birthday - Girl
*Birthday - Man
*Birthday - Woman
*Wedding/Anniversary
*Baby
*Graduation/Congratulations
*Get Well
*Sympathy
*Thank You
*Friendship/Love
*Other
*To Alter (these are cards that need to be finished, old store greeting cards that I can use as backing, or cards that I just think need something done to them before they are truly useable)
*Envelopes
*Any Occasion/General (these are great to keep on hand for a quick transformation into something more specific)
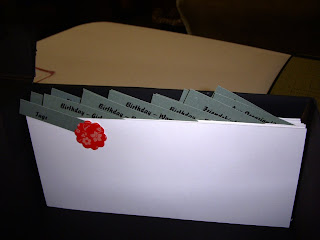
I added one little embellishment to each divider after I stapled the label on at an angle.  I used an epoxy flower on this one, but each of them has something different, sometimes correlating to the category title.
 
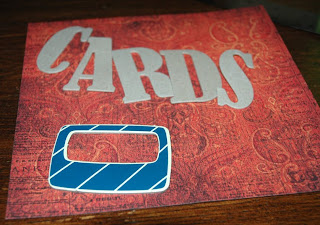
Now to start decorating the outside of the box!  I used chipboard letters that spell "cards" and a chipboard file frame.  I picked out some cute paper that I had been saving from an Archiver's exclusive design pack.  This is going on the front and side of the box.
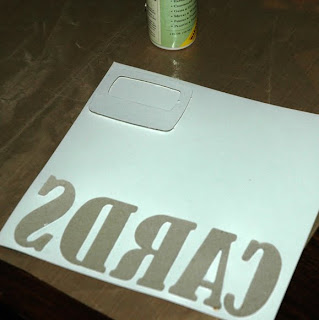
I glue the chipboard onto the paper.  Make sure that anything which has a "right side" is glued right side down onto the paper.  I don't know that the glue type matters as long as it is a glue that is not going to make the paper buckle.  Then I cut out the chipboard; I'm sure that it could be done with a scissor but I used an exacto-knife with a cutting mat. 
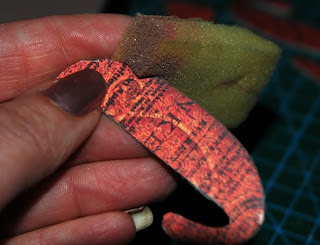
I wanted my chipboard to have a nice blended look, so I used a similar colored ink pad and I dobbed (is that a word?) the ink pad with a sponge and wiped the edges of the chipboard a bit with the sponge.
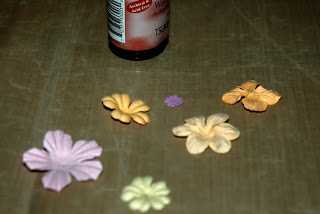
Prima flowers can make everything look a little sweeter.  So, I chose a few flowers for their shape not their color, because I knew that I didn't have any the color I wanted.  I sprayed them with a Terra Cotta walnut ink.  I still didn't have the color I wanted.
 
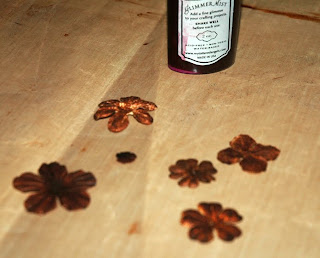
I then sprayed them with some glimmer mist in black cherry.  That gave me the color that I was looking for! 
I used a white ink pad and stamped some butterflys and sayings on the box.  My stamping did not come out great because of the flexibility of the box!  I would recommend a block or something stable on the backside when working with something that is difficult to lay flat.  I didn't want to wreck my corners by forcing the areas that I wanted to stamp.  I actually think it gave it a bit of a whimsical look.  I also repaired some areas by adding bling!
 
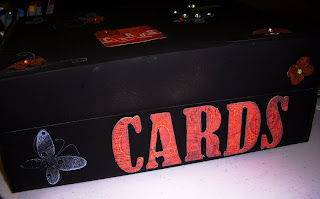
The chipboard and flowers got glued to the box!  I added sparkly stones to the centers of the flowers.
 
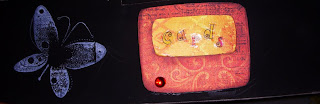
The short side of the box got the chipboard file frame with paper added behind it and sticker letters, to again form the word "cards".  This way no matter which way I stack my box on a shelf, I will know that it is my card box.  I also added another bling stone to that frame.
 
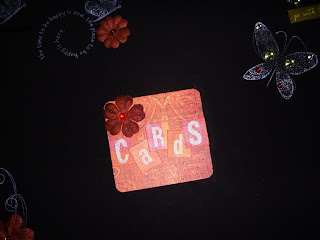
On the top of the box, I added more flowers, bling, some epoxy stickers, and another piece of paper with more letter stickers.  Guess what they spell?  Yep, you guessed it, cards again!  I don't think it would be possible to not know what was in this box!
 
My projects always turn out quite a bit different than what I am imagining.  This one actually turned out a bit sweeter than I thought it would!  So, now the box is finished and I my cards are completely organized!

Wednesday, May 19, 2010

Thrift Find - Wire Manequin

She is so pretty!  I was able to find this gem for only 12 dollars!  I'm not quite sure what to do with her though...
I thought of draping her with scarves and other accessories that are currently hidden away in the closet, but I really don't want to cover up all her beautiful details.  So, I am thinking that she will go into my studio and be used as storage for beads and ribbons and other items girly things.  What would you use her for?  Do you have any inexpensive ideas for a pole and base?  Click on the comments below and let me know what you think!

Monday, April 19, 2010

Pen - Pencil - Marker Storage Ideas - Blog Hop!


Pen - Pencil - Marker Storage Ideas
I have so many ideas when it comes to storage of pens, pencils, and markers!  I hope some of these ideas can help you transform your space and make things more convenient for you.  There are some things to take into consideration when deciding what will work for you.
I believe the main issues are:
Displayed vs. Put Away ~ (Do you work better when your area is free from clutter or do you feel that everything must be visible?)
Vertical vs. Horizontal ~ (Do you believe that pens work better if stored horizontally or vertically? - some manufacturers are specific)
Quantity ~ (A cup full or a file cabinet full)

Portability ~ (Do you travel to crops or with friends often, or do you work at home?)

You don't need to spend a lot of money to make a really attractive storage solution.  Some of the best ideas are dollar store finds or reuse ideas!

I believe that everything looks better if it is containerized... so, if you decide to use cups or vases or glass jars, you may want to containerize them further such as with a basket, box, old drawer, or tray (such as a dresser tray or serving tray) - This also makes your entire collection much more portable!

Just walk through your home or a dollar store...any container has the potential to hold your writing utensils...
Think about paint, paper, fabric, decoupage, trim, stamp, splatter, play with a cut-off cereal box, cups, shoe boxes, sauce jars or cans, plastic bins, or vases.
How about taking a variety of garage sale vases and plant pots and spray painting them all the same matching color and putting them on a mirrored tray - now fill with colorful markers!!


Ikea has a fabulous set that includes a rod with hanging buckets that works fabulously.


Even a brochure holder can be used to containerize your pens, pencils, or markers!
You can even make a pen holder from old diskettes!

Large cookie jars and canisters make a dramatic statement filled with colorful markers or highlighters or colored pencils.
TV Clicker Caddy (Clear) (6 1/2"W x 5"D x 5 1/2"H)Valspar 007.0060689.000 Empty 1 Gallon Paint CanChinese Carry Out Lamp Yellow LampPerfect Sense Drawer Organizer 
How about using a TV remote caddy, mini-paint cans or various Chinese carry-out boxes?  Or a sock compartment from a dresser?  
 
Totally Bamboo Expandable Utility Drawer OrganizerProdyne M-935 Chromed Metal Flatware CaddyPicnic Plus Veranda Utensil Caddy
 
Or a silverware drawer organizer?  Or a picnic table silverware caddy?

I was lucky!  I found a store pen display rack at my local scrapbook store when they were going out of business.  I covered the top and bottom with some of my favorite scrapbooking papers.  I stamped "PLAY" on it and wah-lah!!


Plano 3600 Size Prolatch with Adjustable DividersPlastic Organizer Boxes -Document Design -Set of 5 - by Whitmor - 6211-491-5 (Multi) (3 1/4"H x 9"W x 12"L)Akro-Mils 09514 CFT 14-Inch Plastic Art Supply Craft Storage Tool Box, Semi-Clear

There are many different plastic organizers that can be used.  Think clear plastic shoe boxes, Rubbermaid containers, and plastic bins.
Household Essentials ML-9195 Rectangular-Shaped Woven-Willow Basket, Set of 4Household Essentials ML-6012 Woven-Maize Rectangular-Shaped Baskets with Wood Handles, Set of 3Pioneer 4-1/2 Inch by 8 Inch by 11-1/2 Inch Photo Storage Box, Assorted Designs
Pioneer Jumbo Scrapbook Storage Box, BlackThe Capri 50 Cigar HumidorVaultz Locking Pencil Box, 1.875 Height x 7.75 Width x 4.5 Depth Inches, Black with Chrome Accents (VZ01479)


Baskets, photo boxes, pencil cases, and cigar boxes make great horizontal storage.

Wonderful details on how Trudee from split coast stampers stores her Copic markers along with great ideas on how to keep track of your colors is available on her blog.


Spectrum 48010 Bordeaux Wine Rack, 3-Bottle, Black36 Bottles Modular Hardwood Wine Rack (6 bottles x 6 shelves) 

Any wine rack makes a great storage for pens, pencils, and markers; Just add glasses or cans instead of wine bottles!

Cubes, office rotary spinners, and Office Supply sources are general multipurpose ideas. 
Acrylic or plastic drawers always work well.  
Rolling Carts with Mini-Drawers are excellent options if you have many, many writing utensils.

Isn't this a gorgeous and innovative idea?  Kristen Troyer has a fabulous idea made from pvc pipe that her father helped create!
Tami McBeath shows off the Color Cubbie; a new solution by a friend.
 
Artbin has a bunch of really neat storage solutions.
What if you have a lot of pens!  Maybe you need to store them in a file cabinet, file box, or entire drawer!


Mister art has a zip up pencil pouch that is fun and expandable!


Dick Blick has a very reasonably priced solution here.

           
This spinning tray from mister art could be a lot of fun to fill and bright red too!


Expandable Copic Marker Rack – How fun... collect away!!


How simple is this idea from re-nest?


I like these 12x12 storage boxes - they hold a lot and my goal is to fill each with different things.  Different embellishments etc.  I actually like the snap closure ones better but this gives you an idea.  They are clear, portable, and stack well!
More Ideas:
Do you remember the vase that I decorated for valentines day?  This makes a cool pencil holder!
A fabric/canvas/nylon roll-up storage system is convenient and portable.  These typically have slots for individual items.

You could easily use a 6 pack beer or wine cooler package; use the way it is or recover with your special designs.

Sometimes the original cases are the best and you just want to store them all in a drawer.

A bunch of used grocery store sauce bottles inside of a basket!  You could tie ribbons around these to make them cute!
Most large scrapbooking totes have great marker organizers built in with the elastic that holds them individually.

A tackle box or tool box that you already have might be just what you want.
Even an old mismatched shoe or boot can hold some miscellaneous items!
Any number of similar sized objects, like paint cans, cups, or tin cans can be glued together and stacked on their sides for horizontal storage!
I found a square bucket with ice cream and not having seen a square one before, really felt that it had to be purchased! For storage reasons of course, but I did eat the ice cream too! It would work nicely!
Various boxes - cereal boxes, pasta boxes, cookie boxes, etc... can be taken and cut off at the appropriate height and taped together, spray painted or wrapped with your favorite scrapbooking or wrapping paper and used for pen storage.  These could be used for horizontal or vertical storage depending on the boxes you choose.
Cups are a traditional pencil cup solution.  You could use the plastic dollar store cups that you actually get a few for a dollar and they are colorful.  The traditional  coffee mugs can be used, it's a great way to display any that are sentimental.

If you have a bulletin board near your desk, you can pin a carpenter pouch or sewn dishtowel to the bottom of the board and fill it up.
Metal wall vases make cute containers for a few pens or pencils that you want to hang near by an area.  Maybe next to your phone or door.
This blog post is part of an organizational blog hop for scrapbooking supplies!  Please continue on to the other participants and leave a comment at each one (including here!) and let us know what you think! Thanks for visiting and being a part of our blog hop!

Photograph Storage - Leanne
Embellishment Storage - Jo
Ribbon & Fiber Storage - Shellie
Stamp Storage - Wendy K.
Ink Pad Storage - Ramona
Pen & Pencil Storage - Jeanne M.  **YOU ARE HERE**
Sticker, Die Cuts and Rub-On Storage -Amanda
Tools Storage and Paper Storage - Mary